Inspection and Maintenance: Rainwater Harvesting
Overview[edit]
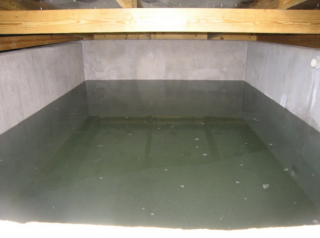
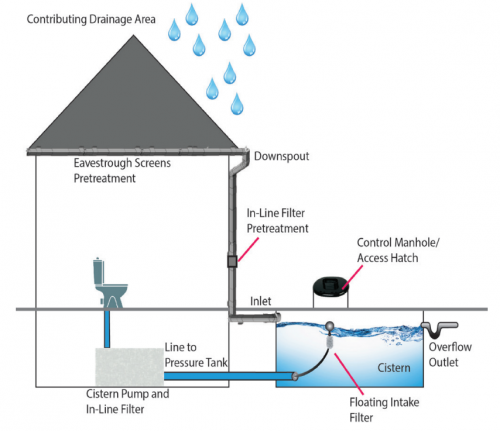
Rainwater harvesting/cisterns uses storage structures that can be installed either:
- Below-ground;
- Indoors that provide a year-round water source; or,
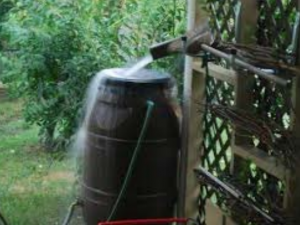
- Aboveground tanks and rain barrels that can only be used seasonally and must be taken out of service for the winter.
Rainwater cisterns can range in size from about 750 to 40,000 litres+ and may be constructed from fiberglass, plastic, metal or concrete.
Underground cisterns are most often installed to a depth below the maximum frost penetration depth (generally 1.2 m in Southern Ontario) (Armstrong and Csathy, 1963; Ministry of Transportation, 2013)[2][3] to ensure they can be used year-round. A pump is used to deliver the stored water to the hose bibs or fixtures where it is utilized. Water that is in excess of the storage capacity of the cistern overflows to an adjacent drainage system (e.g., other BMP or municipal storm sewer) via an overflow outlet structure and pipe. Cisterns that are drawn upon for indoor water uses (e.g., toilet flushing) will also feature water level sensors and the means of adding municipal water during extended periods of dry weather or winter when stormwater does not meet the demand (i.e., make-up water supply system). They may also include in-line devices to filter stored cistern water prior to delivery at hose bibs or fixtures.
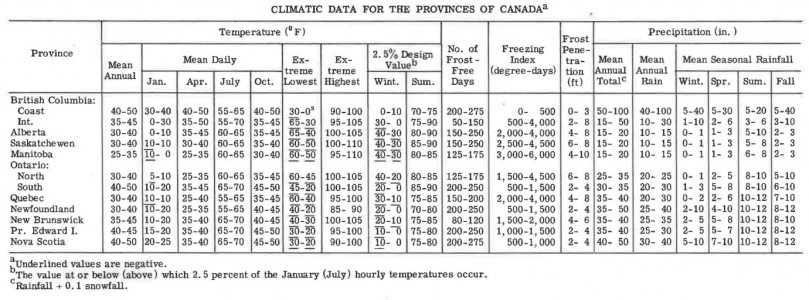
Frost penetration in southern Ontario shown to be 2 - 4 ft. deep (Armstrong and Csathy, 1963)[4].
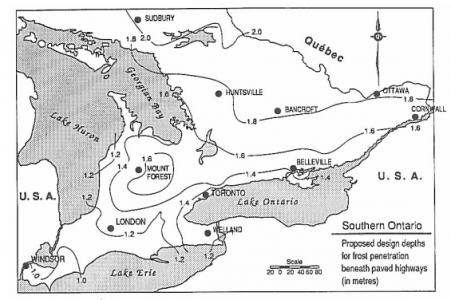
Design depth showing further detailed frost penetration contour lines for southern Ontario ranging from 1.0 - 2.0m deep (Ministry of Transportation, 2013)[5]
Some of the benefits of green roofs include:
- The ability to reduce the quantity of pollutants and runoff being discharged to municipal storm sewers and receiving waters (i.e., rivers, lakes and wetlands);
- Underground and indoor cisterns can be used year-round and located below parking lots, roads, plazas, parkland, landscaped areas or within buildings themselves.
- Can reduce a large commercial building or residential home's water usage significantly if used for non-potable needs
Key components of Underground Infiltration Systems to pay close attention to are the:
Associated Practices[edit]
- Rain Barrels Rain barrels are an above ground form of rainwater harvesting, typically used in residential settings. The precipitation flows from the roof, to the guttering and down the downspout before being diverted to the rain barrel for storage.
- Downspout disconnection Downspout disconnections are common in many older urban centers. They require that residents retroactively disconnect their downspouts from the municipal sewer system. This is due to older sewer systems being undersized for the combined flow of sanitary waste and stormwater.
- Blue roofs are systems that temporarily capture rainwater using the roof as storage and allow it to evaporate and/or to be used for non-potable requirements (i.e. irrigation, toilet flushing, truck washing) and ultimately offset potable water demands.
Inspection and Testing Framework[edit]
Component |
Indicators |
Construction Inspection |
Assumption Inspection |
Routine Operation Inspection |
Verification Inspection |
|---|---|---|---|---|---|
| Contributing Drainage Area | |||||
| CDA Condition | x | x | x | x | |
| Inlet | |||||
| Inlet/Flow spreader structural integrity | x | x | x | ||
| Inlet/Flow spreader obstruction | x | x | x | x | |
| Pretreatment sediment accumulation | x | x | x | ||
| Perimeter | |||||
| BMP dimensions | x | x | x | ||
| Overflow outlets | |||||
| Overflow outlet obstruction | x | x | x | x | |
| Control structure condition | x | x | x | x | |
| Cistern | |||||
| Cistern structural integrity | x | x | x | x | |
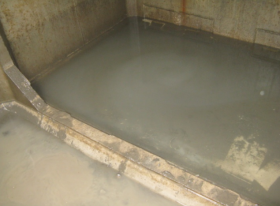
| Cistern sediment accumulation | x | x | x | x |
Component |
Indicators |
Construction Inspection |
Assumption Inspection |
Routine Operation Inspection |
Verification Inspection | |
|---|---|---|---|---|---|---|
| Testing Indicators | ||||||
| Sediment accumulation testing | x | x | x | x | ||
| Cistern pump testing | x | x | (x) | |||
| Note: (x) denotes indicators to be used for Performance Verification inspections only (i.e., not for Maintenance Verification inspections) | ||||||
Construction Inspection Tasks[edit]
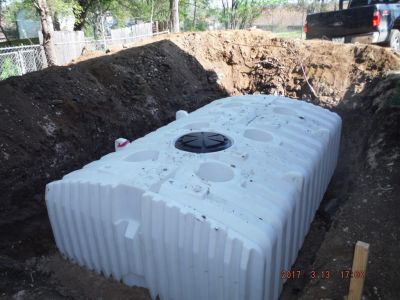
Construction inspections take place during several points in the construction sequence, specific to the type of LID BMP, but at a minimum should be done weekly and include the following:
- During site preparation, prior to BMP excavation and grading to ensure that adequate ESCs and flow diversion devices are in place and confirm that construction materials meet design specifications
- At completion of excavation and grading, prior to backfilling and installation of cistern and pipes to ensure depths, slopes and elevations are acceptable
- At completion of installation of cistern and pipes, prior to completion of backfilling to ensure slopes and elevations are acceptable
- Prior to hand-off points in the construction sequence when the contractor responsible for the work changes (i.e., hand-offs between the storm sewer servicing, paving, building and landscaping contractors)
- After every large storm event (e.g., 15 mm rainfall depth or greater) to ensure Erosion Sediment Controls (ESCs) and pretreatment or flow diversion devices are functioning and adequately maintained. View the table below, which describes critical points during the construction sequence when inspections should be performed prior to proceeding further. You can also download and print the table here
Construction Sequence Step & Timing |
Inspection Item |
Observations* |
|---|---|---|
| Site Preparation - after site clearing and grading, prior to BMP excavation and grading | Natural heritage system and tree protection areas remain fenced off | |
| ESCs protecting BMP layout area are installed properly | ||
| CDA is stabilized or runoff is diverted around BMP layout area | ||
| BMP layout area has been cleared and is staked/delineated | ||
| Benchmark elevation(s) are established nearby | ||
| Construction materials have been confirmed to meet design specifications | ||
| BMP Excavation and Grading - prior to backfilling and installation of cistern and conveyance pipes | Excavation location, footprint, depth and slopes are acceptable | |
| Installations of underdrains/sub-drain pipes (location, elevation, slope) are acceptable | ||
| BMP Installation – after installation of pipes/sewers, prior to backfilling | Installation of structural components (i.e., pretreatment devices, inlets, cistern, overflow outlet, pump, make-up water supply and backflow preventer valve, control manhole/ access hatch) are acceptable and functioning |
Routine Maintenance - Key Components and I&M Tasks[edit]
Regular inspections (twice annually, at a minimum) done as part of routine maintenance tasks over the operating phase of the BMP life cycle to determine if maintenance task frequencies are adequate and determine when rehabilitation or further investigations into BMP function are warranted.
Table below describes routine maintenance tasks for rainwater harvesting practices, organized by BMP component, along with recommended minimum frequencies. It also suggests higher frequencies for certain tasks that may be warranted for cisterns that receive flows from large roof drainage areas or roofs with mature trees near them. Tasks involving removal of debris, sediment and trash may need to be done more frequently in such contexts.
| Component | Description | Inspection & Maintenance Tasks | (Pass) Photo Example | (Fail) Photo Example |
|---|---|---|---|---|
| Contributing Drainage Area (CDA) |
Roof area(s) from which runoff directed to the BMP originates. |
|
||
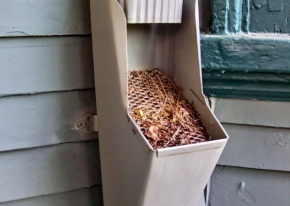
| Pretreatment |
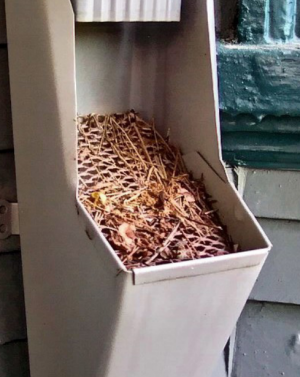
Devices prevent debris and sediment from entering the BMP. Includes eavestrough or downspout screens, first flush diverters or filters on pipes leading to or from the cistern. Reduce the risk of obstructing inlets, intakes or overflow outlet pipes and excessive sediment accumulation. |
|
||
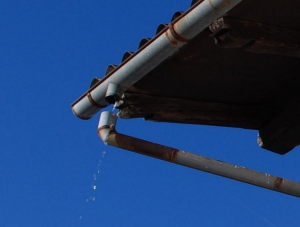
| Inlets |
Pipes connected to eavestroughs or roof drains that deliver water to the BMP. May also include a pipe connected to the municipal water supply line for maintaining cistern water level during dry weather. |
|
||
| Access Hatch |
Hatch, manhole or lid that provides access to the interior of the water storage structure. |
|
||
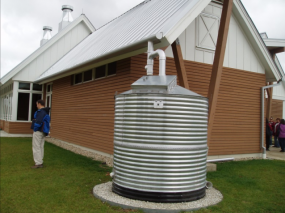
| Cistern or rain barrel |
The water storage structure (e.g., concrete vault, fiberglass, plastic or metal tank, rain barrel). |
|
||
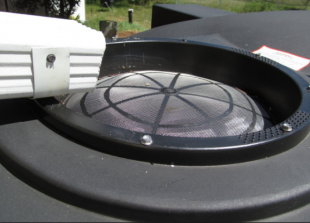
| Pump |
Pressurized device used to deliver stored rainwater to the hose bibs. |
|
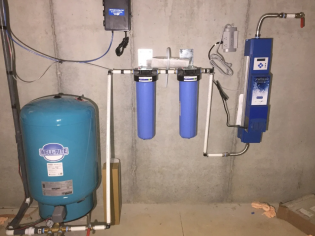 Installation of structural components and current operating level are acceptable and functioning in clean and easily accessible condition as seen here (Photo Source: Meir, 2021)[7] |
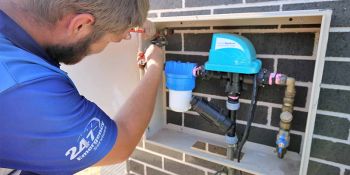 With prolonged usage, the pump capacity declines, causing a reduction in flow rate overall. If the pump is not creating sufficient pressure, and the flow rate is below the design specification, servicing of the pump by a skilled technician should be scheduled (Photo Source: Rapid Plumbing Group Pty Ltd., 2022).[8] |
| Filter |
Cisterns may include an in-line filter device on the intake pipe or prior to delivery of rainwater to hose bibs. |
|
||
| Overflow Outlet |
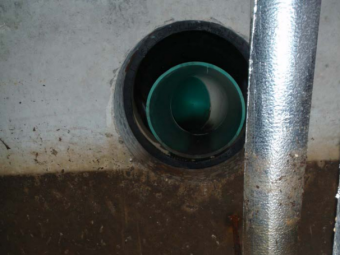
Pipe connected to the cistern or rain barrel that conveys overflows to another drainage system (e.g., municipal storm sewer or other BMP). |
|
Tips to Preserve Basic BMP Function[edit]
- Routinely check the water delivered to hose bibs or fixtures for turbidity or discolouration which could indicate excessive sediment accumulation in the cistern or failure of pretreatment devices or filters.
- Include a filtration device to treat stored water prior to delivery to hose bibs or fixtures as part of the intake/distribution system and clean filters at the same frequency as pretreatment devices.
- If the overflow outlet discharges at grade, the pipe opening should be covered with a coarse screen to prevent entry by insects and animals.
- Provide a means of draining the cistern by gravity to make inspection and maintenance work that requires drainage of the BMP easier to perform.
- Remove accumulated sediment from a large cistern using a pressure washer or hydro-vac truck equipped with a JetVac nozzle to scour and direct sediment to a collection point for removal by vacuuming; for small cisterns, a garden hose and wet shop vacuum may be used.
Rehabilitation & Repair[edit]
Table below provides guidance on rehabilitation and repair work specific to rainwater harvesting systems and rain barrels organized according to BMP component. For more detailed guidance on troubleshooting rainwater harvesting systems refer to [1] (Despins, 2010)[9] and the Canadian Guidelines for Residential Rainwater Harvesting Systems Handbook, developed by the Canadian Mortgage and Housing Corporation (CHMC) (Despins, 2012)[10]
| Component | Problem | Rehabilitation Tasks |
|---|---|---|
| Inlets |
Inlet is producing concentrated flow and causing filter bed erosion. |
|
| Filter Bed | Local or average sediment accumulation ≥ 5 cm in depth. |
|
| Surface ponding remains for >48 hours or surface infiltration rate is <25 mm/h. |
| |
| Damage to filter bed or slide slope is present (e.g., erosion rills, animal burrows, sink holes, ruts) |
| |
| Vegetation |
Vegetation is not thriving and filter media is low in organic matter (<3%) or extractable phosphorus (<10 mg/kg) |
|
| Sub-drain |
Sub-drain perforated pipe is obstructed by sediment or roots. |
|
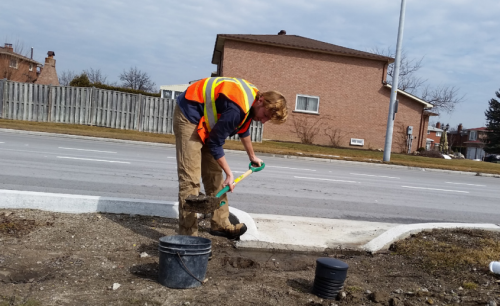
Technician conducting sediment removal to ensure infiltration rates for the
practice are able to maintain > 25 mm/h. Photo Source: TRCA, 2018[11]
- ↑ 1.0 1.1 1.2 TRCA. 2018. Fact Sheet - Inspection and Maintenance of Stormwater Best Management Practices: Rainwater Cisterns. https://sustainabletechnologies.ca/app/uploads/2018/02/Rainwater-Cisterns-Fact-Sheet.pdf
- ↑ Armstrong, M. D., & Csathy, T. I. 1963. Frost design practice in Canada-and discussion. Ontario Department of Highways. https://onlinepubs.trb.org/Onlinepubs/hrr/1963/33/33-008.pdf
- ↑ Ministry of Transportation. 2013. Pavement Design and Rehabilitation Manual. Second Edition. IBSN: 978-1-4435-2873-3. Published: March 2013. http://www.bv.transports.gouv.qc.ca/mono/1165561.pdf
- ↑ Innovative Water Solutions. 2021. Underground Polyethylene Cisterns - An Inexpensive Option for Buried Tanks. Accessed 08 August, 2022. https://www.watercache.com/portfolio/underground-poly-tanks
- ↑ Meir, 2021. Using rainwater inside the home: What you need to know. Written by Jonathan Meier, 29 January 2021. Rain Brothers LLC. Accessed 15 August 2022. https://www.rainbrothers.com/using-rainwater-inside-the-home-what-you-need-to-know
- ↑ Rapid Plumbing Group Pty Ltd. 2022. Penrith Rainwater Services - Rainwater tanks and pumps. Accessed 15 August 2022. https://www.rapidplumbinggroup.com.au/penrith-plumber/rain-water-tank-pump-services/
- ↑ Despins. 2010. Ontario Guidelines for Residential Rainwater Harvesting Systems - Handbook. Accessed August 15, 2022. https://www.harvesth2o.com/adobe_files/ONTARIO_RWH_HANDBOOK_2010.pdf
- ↑ Despins. 2012. Canadian Guidelines for Residential Rainwater Harvesting Systems Handbook. Accessed August 15, 2022. https://www.crd.bc.ca/docs/default-source/water-pdf/cmhcrainwaterhandbook.pdf?sfvrsn=67aa96c9_2.
- ↑ TRCA. 2018. Inspection and Maintenance of Stormwater Best Management Practices - Bioretention. Fact Sheet. https://sustainabletechnologies.ca/app/uploads/2018/02/Bioretention-and-Dry-Swales-Fact-Sheet.pdf
