Difference between revisions of "Construction: final excavated grade and verification"
Kyle menken (talk | contribs) (Created page with "===Final excavated grade and verification=== LID designs typically have very specific grading requirements. Verifying depths and slopes is critical for optimal performance of the facility. For example, if the design calls for a channel with a 1 % slope, the channel may not function as designed if it has a 2 % slope instead. Similarly, if the designs call for 1 metre of excavation from grade and only 90 cm are excavated, it will not have enough storage space to meet the d...") |
|||
| (9 intermediate revisions by 2 users not shown) | |||
| Line 1: | Line 1: | ||
LID designs typically have specific grading requirements. Verifying depths and slopes is critical for the optimal performance of the facility. For example, if the design calls for a channel with a 1% slope, the channel may not function as designed if it has a 2% slope instead. | |||
LID designs typically have | |||
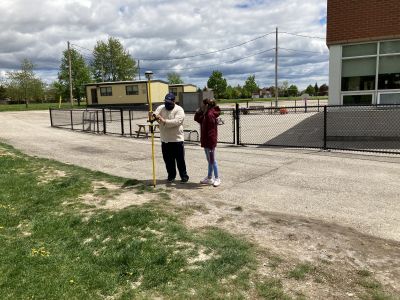
[[File:trimble unit.JPG|400px|thumb|right|Always confirm elevations throughout construction. (Photo source: CVC)]] | |||
<u>Excavation to the sub-grade</u> will differ depending on whether the design is for a [[Bioretention: Variations|full infiltration, partial infiltration, or no infiltration LID system]]. If it’s a full infiltration or partial infiltration practice, the sub-grade should be as level as possible to promote even infiltration across the facility’s footprint. For no infiltration designs, excavate sub-grade slopes to the design grade in the direction of the underdrain, typically 1 to 2%. | |||
As with all infiltrating LID practices, avoid compaction of sub-grade soils whenever possible. However, depending on the design and the local municipality, compaction of the sub-grade may be required for permeable pavement LIDs. | |||
'''Construction steps''' | '''Construction steps''' | ||
#Excavate | #Excavate the final 100 mm, to the final design grade, using appropriate equipment. This is often done with hand tools. | ||
#Confirm excavation depths and slopes using appropriate equipment (transit levels, global navigation satellite systems, etc.) | #Confirm excavation depths and slopes using appropriate equipment (transit levels, global navigation satellite systems, etc.) | ||
'''Key inspection points''' | '''Key inspection points''' | ||
*Confirm final excavated depths and slopes. | *Confirm final excavated depths and slopes. | ||
'''Mistakes to avoid''' | '''Mistakes to avoid''' | ||
* | *“eye-balling” depths and slopes | ||
Latest revision as of 14:58, 22 September 2022
LID designs typically have specific grading requirements. Verifying depths and slopes is critical for the optimal performance of the facility. For example, if the design calls for a channel with a 1% slope, the channel may not function as designed if it has a 2% slope instead.
Excavation to the sub-grade will differ depending on whether the design is for a full infiltration, partial infiltration, or no infiltration LID system. If it’s a full infiltration or partial infiltration practice, the sub-grade should be as level as possible to promote even infiltration across the facility’s footprint. For no infiltration designs, excavate sub-grade slopes to the design grade in the direction of the underdrain, typically 1 to 2%.
As with all infiltrating LID practices, avoid compaction of sub-grade soils whenever possible. However, depending on the design and the local municipality, compaction of the sub-grade may be required for permeable pavement LIDs.
Construction steps
- Excavate the final 100 mm, to the final design grade, using appropriate equipment. This is often done with hand tools.
- Confirm excavation depths and slopes using appropriate equipment (transit levels, global navigation satellite systems, etc.)
Key inspection points
- Confirm final excavated depths and slopes.
Mistakes to avoid
- “eye-balling” depths and slopes
