Difference between revisions of "Construction: pretreatment and inlet"
| Line 20: | Line 20: | ||
<gallery mode="packed" widths=275px heights=275px> | <gallery mode="packed" widths=275px heights=275px> | ||
P1160102.JPG|Installation of Jellyfish filter and sorbtive media vault at the IMAX bioswale project in Mississauga, ON. | P1160102.JPG|Installation of Jellyfish filter and sorbtive media vault at the IMAX bioswale project in Mississauga, ON. (Photo Source: CVC, 2012) | ||
P1160117.JPG|Installation of Jellyfish filter and sorbtive media vault at the IMAX bioswale project in Mississauga, ON. | P1160117.JPG|Installation of Jellyfish filter and sorbtive media vault at the IMAX bioswale project in Mississauga, ON. (Photo Source: CVC, 2012) | ||
P1160121.JPG|Installation of Jellyfish filter and sorbtive media vault at the IMAX bioswale project in Mississauga, ON. | P1160121.JPG|Installation of Jellyfish filter and sorbtive media vault at the IMAX bioswale project in Mississauga, ON. (Photo Source: CVC, 2012) | ||
</gallery> | </gallery> | ||
Revision as of 15:21, 22 September 2022
Pre-treatment structures are most cost effective when they slow down incoming flows, collect sediment for easy clean out, and slowly release water to the bioretention facility mitigating erosion. Pretreatment structures/strategies can include curb cuts, Aggregates, proprietary devices like filters or hydrodynamic separators, vegetation, concrete sumps, membrane filters, overland flow sumps, etc.
Construction Steps:
- Installation of pre-treatment features will vary based upon type. Similarly, installation timeline will range with type and could occur at excavation and mass grading, curb work or at finishing grade. Given pre-treatment features are typically integrated with the LID inlet coordination amongst multiple sub-contractors is sometime needed. The following details steps for various pre-treatment types:
- Vegetation: Follow the guidance shown below in the section “Plant Material Verification and Installation”
- Curbing: Follow the guidance shown above in the section “Curbing”.
- Aggregate: Follow the guidance shown above in the section “Stone reservoir”.
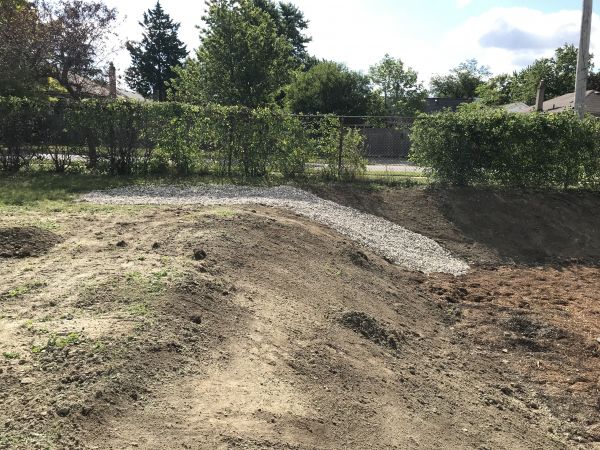
Aggregate material (rock) installed as the inlet and pre-treatment device in the rain garden at Glendale P.S. in Brampton, ON. The runoff comes from a vegetated swale into the inlet, conveying it into the rain garden. (Photo Source: CVC, 2021)

Aggregate material (rock) installed as the inlet and pre-treatment device in the rain garden at Glendale P.S. in Brampton, ON. The runoff comes from a vegetated swale into the inlet, conveying it into the rain garden. (Photo Source: CVC, 2021)
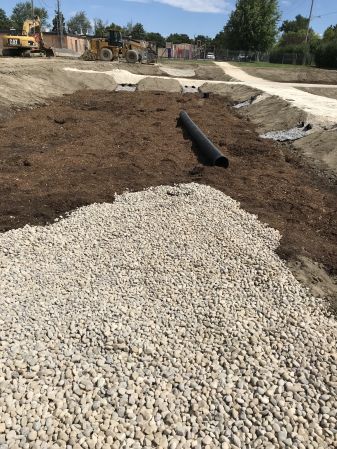
Aggregate material (rock) installed as the inlet and pre-treatment device in the rain garden at Glendale P.S. in Brampton, ON. The runoff comes from a vegetated swale into the inlet, conveying it into the rain garden. (Photo Source: CVC, 2021)


Proprietary pre-treatment device[edit]
- Excavate and prepare base for proprietary pre-treatment device according to design.
- Install proprietary pre-treatment device according manufacturer directions.
- Manufacturer representative may need to confirm proper installation and functioning through approved testing and inspection.
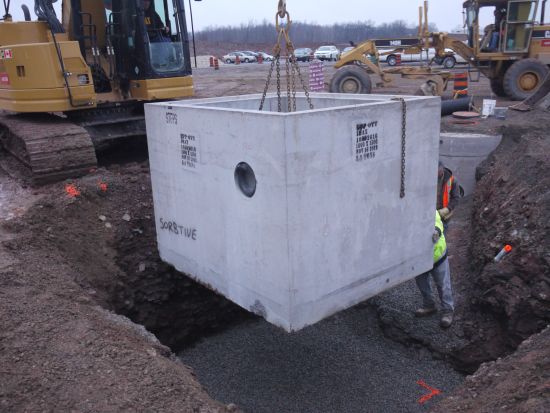
Installation of Jellyfish filter and sorbtive media vault at the IMAX bioswale project in Mississauga, ON. (Photo Source: CVC, 2012)
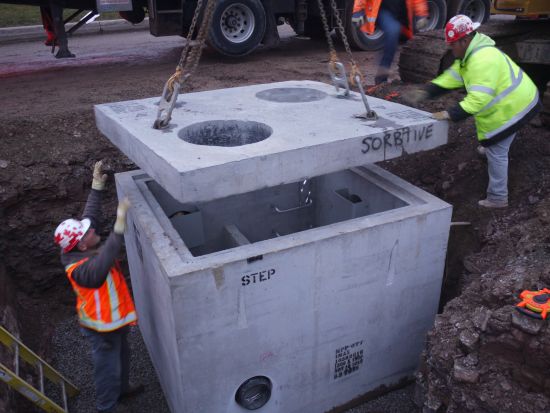
Installation of Jellyfish filter and sorbtive media vault at the IMAX bioswale project in Mississauga, ON. (Photo Source: CVC, 2012)
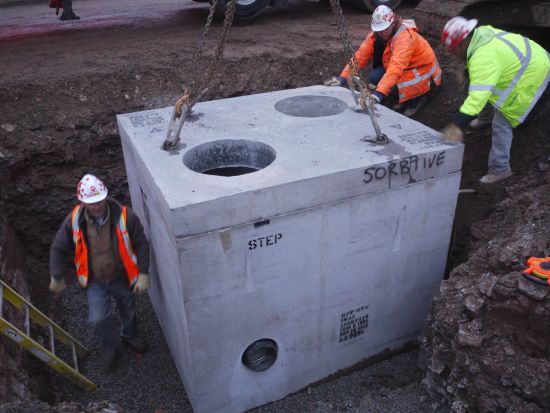
Installation of Jellyfish filter and sorbtive media vault at the IMAX bioswale project in Mississauga, ON. (Photo Source: CVC, 2012)


Key Inspection Points:
- Verify that the correct pre-treatment device (jellyfish filter, vegetation, curbing, etc.) is being installed.
- Verify that all components of the pre-treatment device are installed
- Verify correct size and location of pre-treatment device.
- Verify correct elevation, slope, and footing according to design
- Is it tied into the curb, downspout, or other inlet? Or could happen before the curbing?
- Wet weather performance check:
- Does it work?
- Is water entering the LID facility properly?
- Is sediment and debris accumulating?
- Is it dissipating erosive forces?
Mistakes to Avoid:
- Pre-treatment component parts are missing
- Grading/elevation errors that deviates from design
- Incorrect pipe inverts causing short circuiting
- Insufficient grade drop or slope into pre-treatment to ensure positive flow of water
- Improper grading from pre-treatment to LID feature inhibiting positive flow
- Insufficient sump depth to account for sediment and debris accumulation
- Using wrong concrete forms if concrete curbs are part of pre-treatment.
For more information about pre-treatment strategies and their design, visit these page: Pretreatment and Pretreatment features.