Difference between revisions of "Pre-construction"
| (11 intermediate revisions by the same user not shown) | |||
| Line 183: | Line 183: | ||
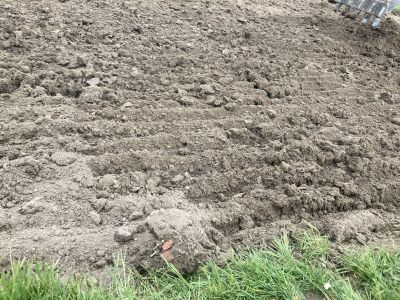
[[File:ESC perpendicular grooves.jpg|400px|thumb|right|Grooves perpendicular to the grade help prevent the development of rills. (Photo source: CVC, 2022)]] | [[File:ESC perpendicular grooves.jpg|400px|thumb|right|Grooves perpendicular to the grade help prevent the development of rills. (Photo source: CVC, 2022)]] | ||
STEP's [https://sustainabletechnologies.ca/home/urban-runoff-green-infrastructure/healthy-soils/construction-specifications-for-implementing-compost-amended-planting-soil-in-ontario/ Erosion and Sediment Control Guide for Urban Construction]]<ref> STEP. 2019. Erosion and Sediment Control Guide for Urban Construction. https://sustainabletechnologies.ca/home/urban-runoff-green-infrastructure/healthy-soils/construction-specifications-for-implementing-compost-amended-planting-soil-in-ontario/</ref> contains detailed guidance on the design, installation, inspection, maintenance, and decommissioning of ESC measures. This section gives practical advice on structural and non-structural ESC for contractors, inspectors, and those who are new to construction and ESC practices. | |||
Establish required perimeter controls, including erosion and sediment control (ESC) measures, prior to construction and adjust accordingly during construction. ESC measures come in two basic types: structural ESC, which slows and holds runoff from the disturbed area, dissipating erosive forces, promoting ponding, and allowing suspended particles to settle out; and non-structural ESC, which primarily minimizes the exposure time of stripped soils. | Establish required perimeter controls, including erosion and sediment control (ESC) measures, prior to construction and adjust accordingly during construction. ESC measures come in two basic types: structural ESC, which slows and holds runoff from the disturbed area, dissipating erosive forces, promoting ponding, and allowing suspended particles to settle out; and non-structural ESC, which primarily minimizes the exposure time of stripped soils. | ||
| Line 247: | Line 247: | ||
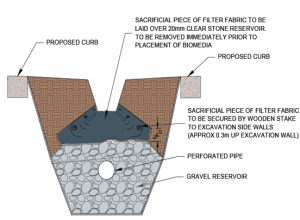
[[File:ESC sacrificial fabric.png|300px|thumb|center|]] | [[File:ESC sacrificial fabric.png|300px|thumb|center|]] | ||
| | | | ||
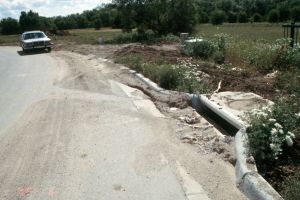
[[File:ESC premature removal.jpg|300px|thumb|center|ESC measures at this bioretention feature were removed before construction in its drainage was complete, allowing sediment into it.]] | [[File:ESC premature removal.jpg|300px|thumb|center|ESC measures at this bioretention feature were removed before construction in its drainage was complete, allowing sediment into it.(Photo Source: CVC)]] | ||
|} | |} | ||
==Erosion and sediment control inspection and maintenance== | ==Erosion and sediment control inspection and maintenance== | ||
ESC measures require ongoing attention to ensure integrity and performance. ESC inspections should take place, at minimum, during installation, after rainfall events, and at the critical inspection points discussed in the [[Pre-construction: | ESC measures require ongoing attention to ensure integrity and performance. ESC inspections should take place, at minimum, during installation, after rainfall events, and at the critical inspection points discussed in the [[Pre-construction#Communication, inspection plan, and utilities coordination|Pre-construction: Communication, inspection plan, and utilities coordination]] | ||
At these inspections, keep an eye out for accumulated sediment, worn materials, compliance with the project's staging plan, and potential failure points. | At these inspections, keep an eye out for accumulated sediment, worn materials, compliance with the project's staging plan, and potential failure points. | ||
| Line 276: | Line 276: | ||
*Ensure perimeter fencing and access/staging areas are in alignment with design drawings. | *Ensure perimeter fencing and access/staging areas are in alignment with design drawings. | ||
'''Mistakes to avoid''' | '''Mistakes to avoid''' | ||
*Departing from the plan to stage and limit access points, material storage areas, and equipment storage areas | |||
*Installing inadequate perimeter controls, e.g. inadequate sediment fencing or construction fencing | |||
==References== | |||
Latest revision as of 21:29, 22 September 2022
Overview[edit]
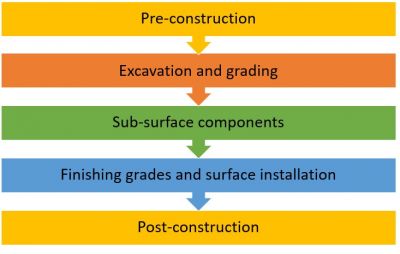
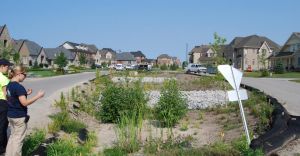
The construction guidance in this section applies to all sub-surface and ground-level LID practices: bioretention gardens, bioswales, rain gardens, exfiltration trenches, enhanced swales, permeable pavements, infiltration trenches, infiltration chambers, and soakaways. It was developed for project managers, engineers, and contractors on the pre-construction steps required for successful construction of sub-surface and ground-level LID practices.
Design verification and site walk-through[edit]
When the design is 90% complete, the project manager (PM) should conduct a walk-through of the site to verify that the designs match site conditions. This site walk-through is a critical step in the transition from design to construction and helps the project manager plan for future pre-bid or pre-construction meetings. Think carefully about how a contractor will be able to build the LID practice. At this stage, determine if the design drawings and construction notes address specific LID construction requirements, and determine whether they contain inaccuracies or are missing detail. The table below identifies details key points and considerations for the walk-through.
| Verification point | Key considerations |
|---|---|
| Adjacent land uses |
|
| Contributing and receiving drainage areas |
|
| Seasonal maintenance operations | |
| Location of LID features |
|
| Existing and planned infrastructure/utilities |
|
| Property boundaries and building foundations |
|
| Natural heritage features and existing vegetation |
|
| Access, sequencing, staging, and constructability |
|
LID construction notes[edit]
LID design drawings need detailed construction notes within the design drawings. These notes should include:
- sequencing and staging areas
- material specifications
- testing requirements
- installation procedures
- elevations and invert details for inlet, outlet, and overflow features
- grading details for conveyance features
- erosion and sediment control requirements
- inspection and maintenance responsibilities during construction and prior to assumption
The last two bullets require further comment. LID facilities are most vulnerable to sedimentation and clogging during their own construction and construction of adjacent and connected lands. LID construction contracts should specify a sufficient combination of ESC measures and inspection and maintenance of the LID facility during the construction and assumption phases to ensure that it will function without remediation. Contracts for larger-scale projects, e.g., where the LID facility in question is part of a road reconstruction project or subdivision development, should contain clear terms covering responsibilities for keeping sediment from entering newly constructed LID features and removing it if necessary.
Tendering and contract[edit]
The project contract and tendered drawings, including details, notes, ESC requirements, material specifications, and testing requirements should align. Given that most standard contract templates do not include wording specific to LID construction, considerations for LID can be placed under special provisions within the contract.
Details within the drawings and contract should also be accurately reflected in the tender bid form. A detailed bid form that reflects the entirety of the work allows contractors to deliver accurate bids, lessens the likelihood of project shortcuts, and helps to ensure transparency amongst bids. Ultimately, clear bid pricing reduces the potential for misunderstandings and conflicts and attracts experienced contractors.
Minimum contractor requirements[edit]
Many contractors are unfamiliar with building LID practices. Consider mandating contractor training, attendance at pre-bid meetings, LID project references, and bid bond insurance as prerequisites.
Communication, inspection plan, and utilities coordination[edit]
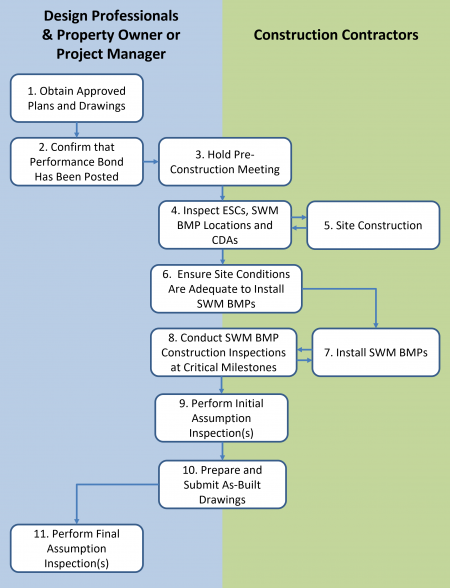
After securing a contractor, a pre-construction meeting between the project manager, project engineer, and contractor will facilitate an efficient job site and reduce the potential for miscommunication. These meetings should cover:
- LID design details and construction notes
- material specifications, inspections, and chain-of-custody
- access routes and storage areas
- protection of LID practices: phasing, ESC, and perimeter fencing
- equipment requirements and recommendations
- verification of field changes
- plant establishment and warranty-period maintenance
- ownership and assumption protocols
- project inspection plan
- verification processes for field changes to the design and material substitutions
The table below expands upon the bullets above and provides helpful guidance on communication topics at the pre-construction meeting. Given the lead-up time needed for testing requirements of specified materials, these discussions should occur soon after the contract is awarded, ideally 2 months prior to project construction.
| Communication topic | Guidance |
|---|---|
| LID design details and construction notes |
|
| Material specifications, inspections, and chain-of-custody |
|
| Access routes and storage areas |
|
| Protection of LID practices during construction: phasing, ESC, and perimeter controls |
|
| Equipment requirements and recommendations |
|
| Verification of field changes |
|
| Plant establishment and warranty-period maintenance |
|
| Ownership and assumption protocols |
|
| Project inspection plan |
|
Inspection plan[edit]
The inspection and maintenance page gives detailed guidance on how to conduct construction inspections for LID practices. Generally, construction inspections should be continuous as the work progresses. If this isn’t possible, critical inspection points are:
- site preparation
- excavation
- installation of pipes, granular, and biomedia
- finishing grades
- surface treatment installation: pavers, plants, porous concrete, etc.
- after rain events (see ESC inspection and maintenance)
- whenever sub-contractors or utilities begin work (hand-off points)
The last element—inspection of sub-contractors—requires further comment. For example, if a sub-contractor is installing the curbing, they need to understand the purpose of the curbing and curb cuts, i.e., that they are meant to direct water into the LID facility, not to the closest catch basin. Without this knowledge, the sub-contractor may mistakenly build the curbs as they usually do: to direct water into a catchbasin.
Utilities coordination[edit]
Similarly, if the LID practice is in close proximity to sub-surface utilities, the utility owner may use their own contractors to perform related work. If this is the case, these sub-contractors must also be made aware of the LID practice’s purpose, how compaction affects performance, keeping the LID practice clear of excavated dirt and generally how their work could impede the construction and performance of the LID practice. In general, communication between the contractors, project managers, and project engineers should be frequent and open.
Erosion and sediment control measures[edit]
STEP's Erosion and Sediment Control Guide for Urban Construction][1] contains detailed guidance on the design, installation, inspection, maintenance, and decommissioning of ESC measures. This section gives practical advice on structural and non-structural ESC for contractors, inspectors, and those who are new to construction and ESC practices.
Establish required perimeter controls, including erosion and sediment control (ESC) measures, prior to construction and adjust accordingly during construction. ESC measures come in two basic types: structural ESC, which slows and holds runoff from the disturbed area, dissipating erosive forces, promoting ponding, and allowing suspended particles to settle out; and non-structural ESC, which primarily minimizes the exposure time of stripped soils.
For non-structural ESC measures, be sure to:
- Stage clearing and grubbing to minimize exposure of stripped soils.
- Watch the weather and adjust plans accordingly.
- Manage and demarcate heavy equipment routes away from LID practices.
- Use simple, common-sense methods, such as scarifying exposed soils perpendicular to the grade to prevent the development of rills.
- Create and use a pollution prevention plan for fuels or solvents.
Generally, all exposed soils that are not being actively worked on must have temporary erosion protection or permanent cover within 7 days for slopes 3:1 or greater and 14 days for slopes 3:1 or lesser. This should apply to all exposed soil areas year-round and until the site is stabilized.
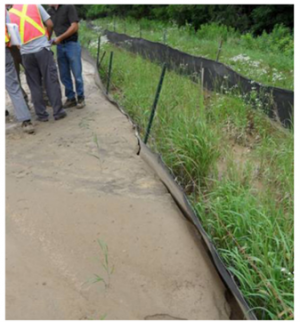
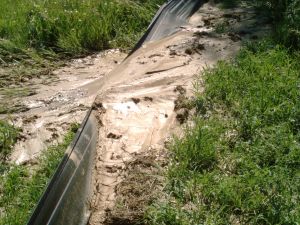
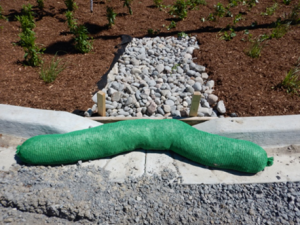
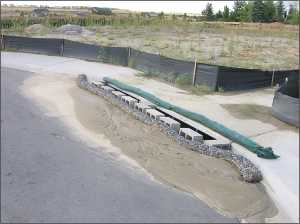
The table below gives guidance on common mistakes made when installing structural ESC measures.
| Structural ESC measure | Do | Don't | (Pass) Photo Example | (Fail) Photo Example |
|---|---|---|---|---|
| Sediment fencing |
|
|
||
| Inlet controls |
|
|
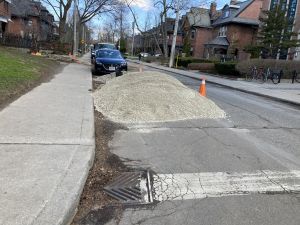
||
| Stockpiles |
|
|
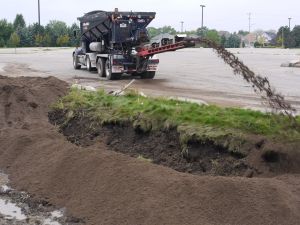
||
| Protecting features during construction, including using sacrificial filter fabric |
|
|
Erosion and sediment control inspection and maintenance[edit]
ESC measures require ongoing attention to ensure integrity and performance. ESC inspections should take place, at minimum, during installation, after rainfall events, and at the critical inspection points discussed in the Pre-construction: Communication, inspection plan, and utilities coordination
At these inspections, keep an eye out for accumulated sediment, worn materials, compliance with the project's staging plan, and potential failure points.
Mobilization, access, staging, and perimeter controls[edit]
In tandem with installation of ESC measures, setting up access and staging areas is one of the first steps in any construction project. Perimeter controls such as construction fencing are often combined with silt fencing. Safety fencing may be needed to restrict public access to the site, especially if the site sees lots of pedestrian traffic. Together, construction fencing and structural ESC measures should demarcate:
- limits of construction
- heavy equipment routes
- equipment and material storage areas
- LID practice footprints
- natural heritage features
- access areas
Construction steps
- Install perimeter fencing/sediment fence in alignment with design drawings and ESC plan.
- Demarcate staging and access points with fencing or surface markings in alignment with design drawings.
Key inspection points
- Ensure perimeter fencing and access/staging areas are in alignment with design drawings.
Mistakes to avoid
- Departing from the plan to stage and limit access points, material storage areas, and equipment storage areas
- Installing inadequate perimeter controls, e.g. inadequate sediment fencing or construction fencing
References[edit]
- ↑ STEP. 2019. Erosion and Sediment Control Guide for Urban Construction. https://sustainabletechnologies.ca/home/urban-runoff-green-infrastructure/healthy-soils/construction-specifications-for-implementing-compost-amended-planting-soil-in-ontario/
